
Board basics
Organize a project's work as drag-and-drop cards in columns.
Every project opens to its own board — a set of columns holding cards. A card is one thing that needs doing, and it carries everything about that work: a description, a checklist, labels, attachments, a due date, and a discussion.
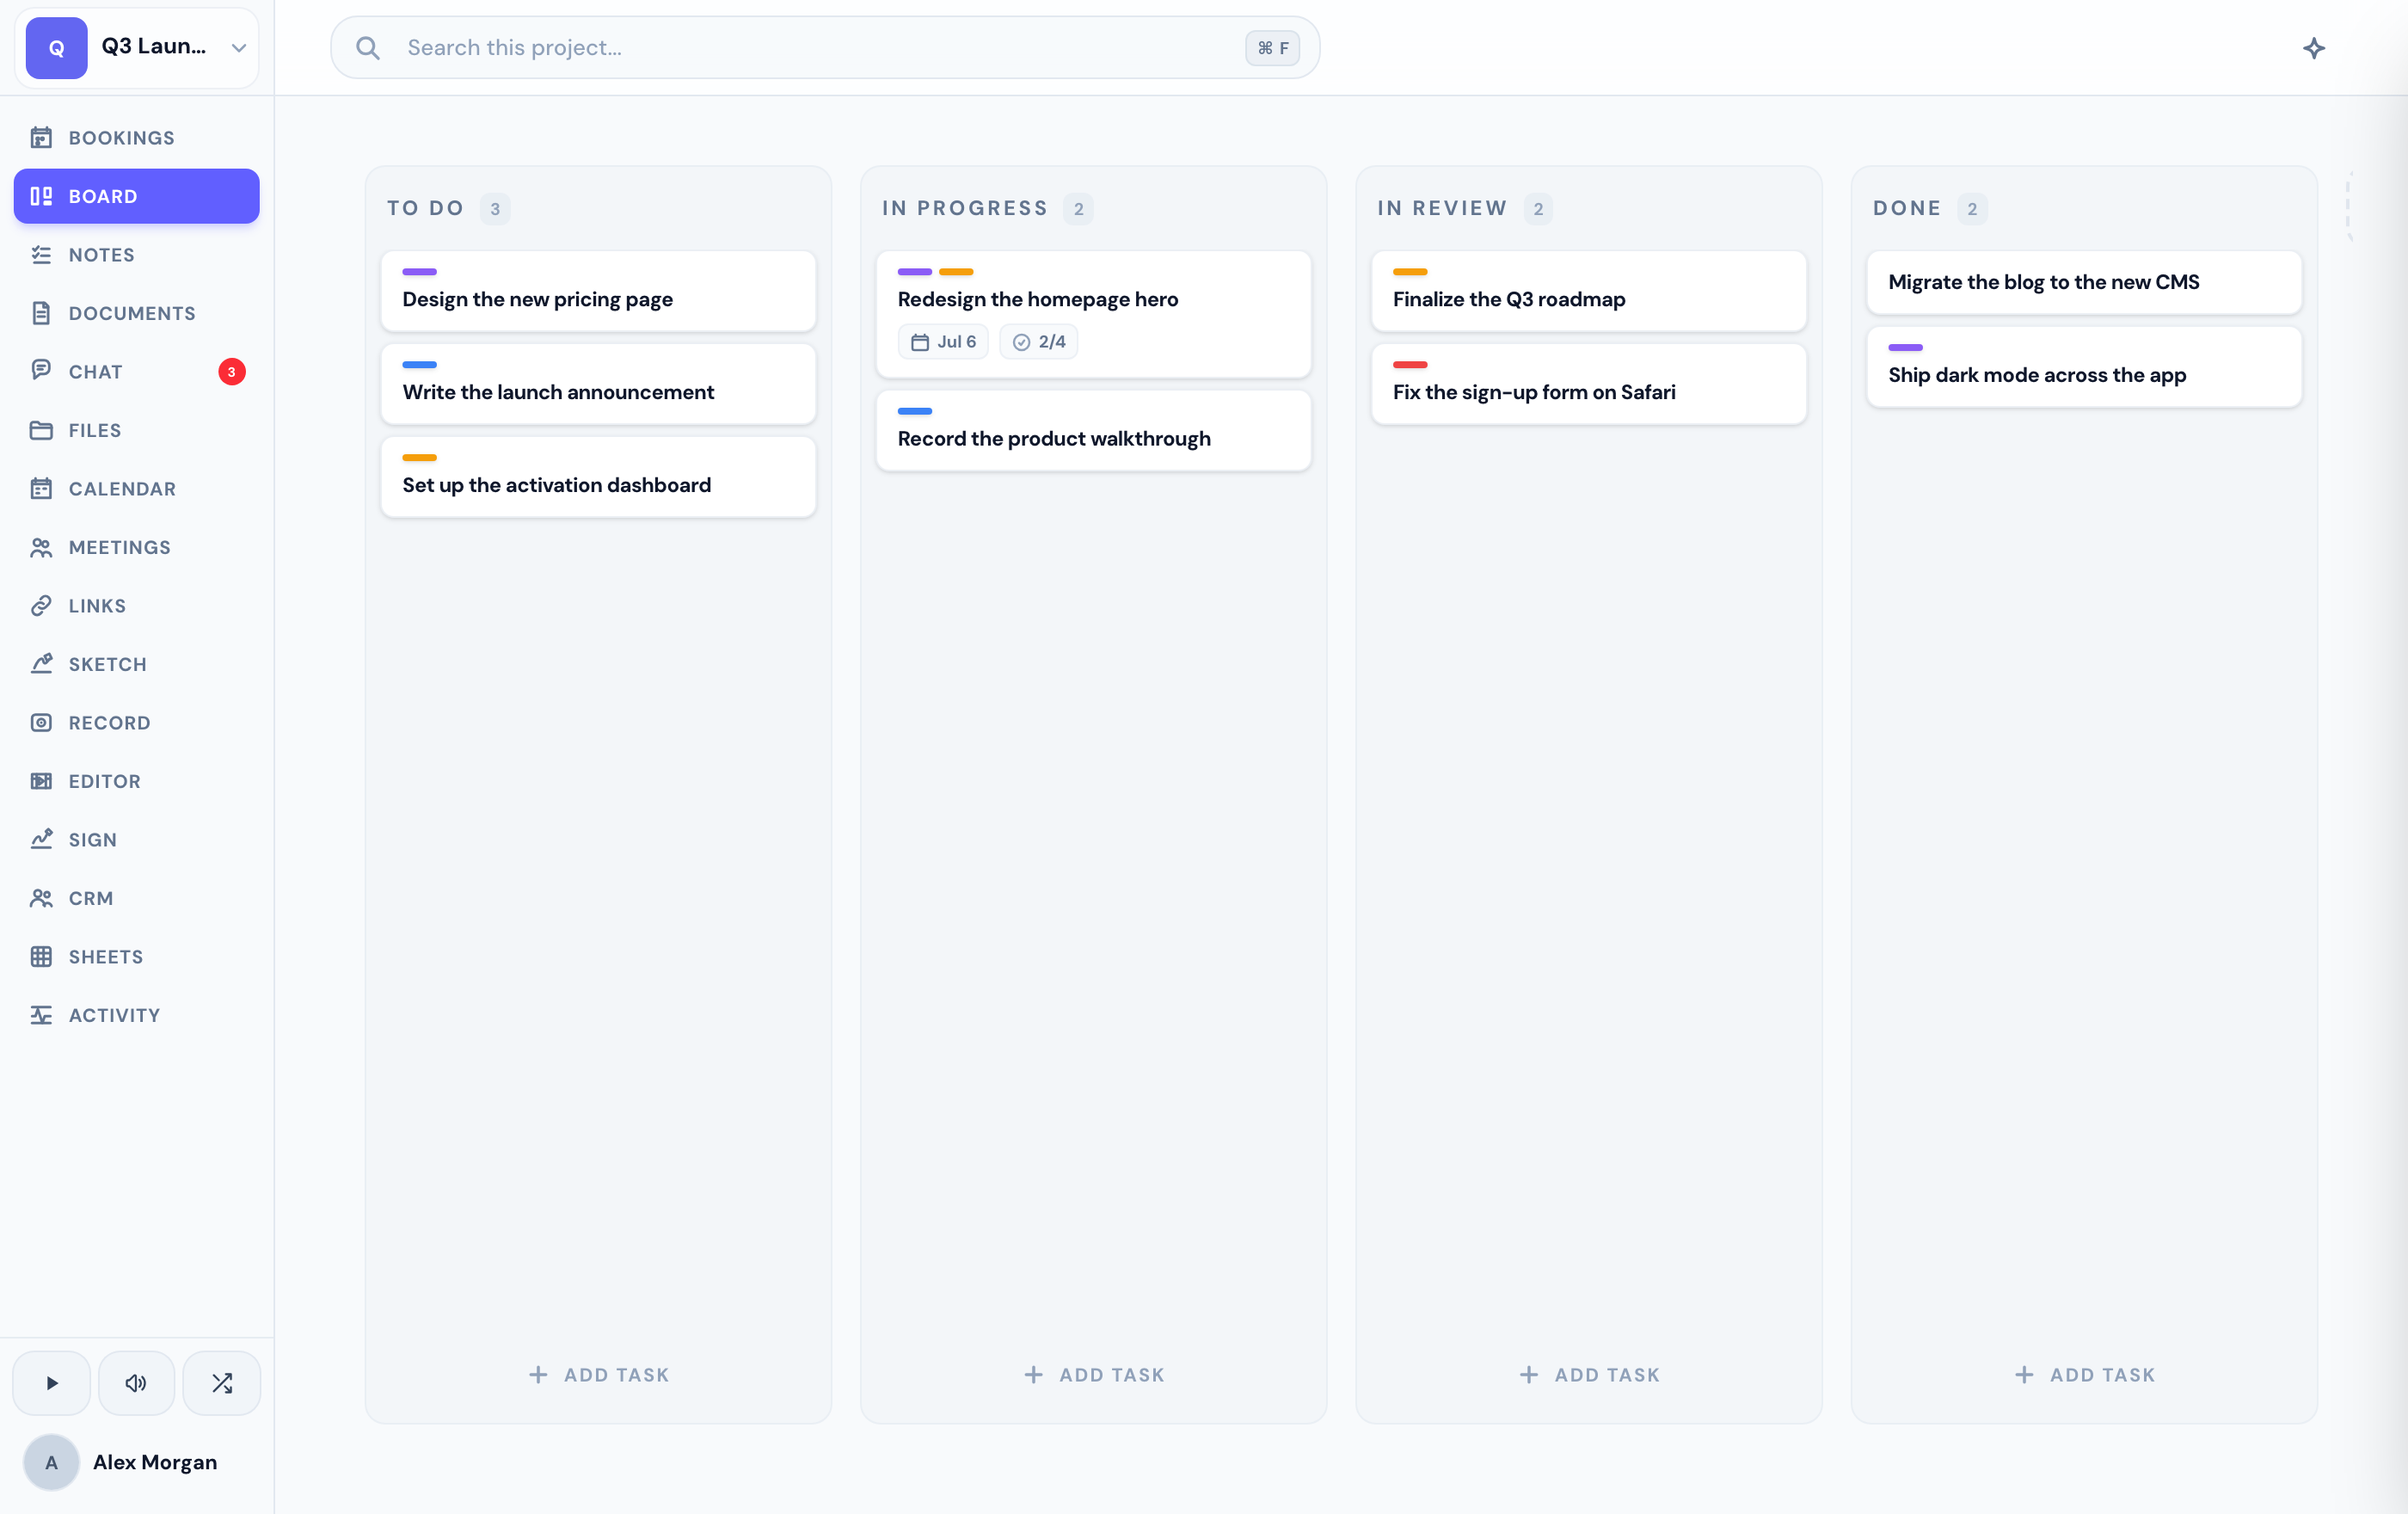
Add columns and cards
Choose New Column and name it for a stage of your work — for example To Do, In Progress, and Done.
In any column, type into What needs to be done? and press Enter. The card appears at the top of the column.
Drag a card between columns as the work progresses. Reorder columns by dragging their headers.
Inside a card
Open a card to reveal its detail panel. Each section collapses so you can focus on what matters:
- Description — the details of the task, with rich text.
- Checklist — break the work into items; hide completed ones with a toggle.
- Labels — colored tags to categorize and filter.
- Files — attach anything relevant to the card.
- Discussion — comment and @mention teammates, who get notified.
- Due date — when it needs to be done.
You can create and update cards by asking Scout. Press ⌘ K and say something like "add a card to review the homepage copy, due Friday" — it lands on the board in the right column.
Card templates
Beyond a normal card, projects include Bug and Feature templates with their own fields — like severity or priority — and admins can create custom templates for how your team works.
Related
Was this helpful?